Vinyl Flooring Installation the Easy Way: Simple Steps for DIY Success

Vinyl Flooring Installation the Easy Way makes the process simple and stress-free—follow the right steps, and anyone can achieve great results
Vinyl flooring has become a popular choice for many homeowners. It’s durable, affordable, and looks great in any room. Vinyl Flooring Installation the Easy Way sounds great—but the idea of doing it yourself can feel daunting. Don’t worry; it doesn’t have to be hard. With some basic tools and a little guidance, you can lay down vinyl flooring without any hassle.
This guide will show you Vinyl Flooring Installation the Easy Way—step-by-step instructions for a smooth and hassle-free DIY project. From preparing your space to placing the final plank, you’ll find all the tips you need. Let’s get started on transforming your home with beautiful, new vinyl floors.
Credit: www.bentswoodworking.com
Introduction To Vinyl Flooring
Vinyl flooring is a popular choice for many homeowners. It offers durability, affordability, and style. If done right, Vinyl Flooring Installation the Easy Way can be straightforward, giving you a smooth and stress-free result.
This guide will introduce you to the world of vinyl flooring, its benefits, and the different types available.
Benefits Of Vinyl Flooring
Vinyl flooring is known for its resilience. It can withstand heavy foot traffic. Water spills are not a problem. Maintenance is easy. Just sweep and mop regularly.
Vinyl flooring is also affordable compared to other options. You can get a high-end look at a lower cost. It comes in various designs and patterns. You can mimic wood, stone, or tile.
Types Of Vinyl Flooring
There are different types of vinyl flooring. Each type has its own features. Sheet vinyl comes in large, continuous sheets. It is waterproof and easy to clean. Vinyl tiles are another option. They are easy to replace if damaged. You can create unique patterns with tiles.
Luxury Vinyl Planks (LVP) are popular too. They look like hardwood but are more durable. LVP is easy to install and maintain.
Credit: www.homedepot.com
Preparing Your Space
Preparing your space is the first step to a successful vinyl flooring installation. It sets the foundation for a smooth and efficient process. Skipping this step can lead to problems later.
Follow these steps to ensure your space is ready for your new flooring.
Gathering Tools And Materials
Start by gathering all necessary tools and materials. You will need a tape measure, utility knife, adhesive, and a notched trowel. Have a straightedge and a chalk line for precise cuts and measurements. Don’t forget safety gear like gloves and knee pads.
Measuring The Room
Accurate measurements are key. Use your tape measure to find the length and width of your room. Multiply these to get the square footage. Add 10% to this number. This extra material will account for mistakes and future repairs.
Removing Old Flooring
Remove any existing flooring. This might include carpet, tiles, or old vinyl. Use a utility knife to cut and peel away the old material. Make sure the subfloor is clean and smooth. Any debris or bumps can affect your new floor’s appearance and durability.
Subfloor Preparation
Subfloor preparation is crucial before installing vinyl flooring. A well-prepared subfloor ensures a smooth, long-lasting finish. Let’s break down the key steps: cleaning, leveling, and repairing.
Cleaning The Subfloor
Start by removing all debris. Sweep the area thoroughly. Use a vacuum to pick up fine dust and dirt. Ensure the surface is clean. Any leftover debris can affect the vinyl installation.
Leveling The Subfloor
Check the subfloor for uneven spots. Use a long level tool to identify high and low areas. Sand down any high spots. Fill low areas with a leveling compound. This creates a flat surface. A level subfloor is vital for vinyl flooring.
Repairing Damaged Areas
Inspect the subfloor for damage. Look for cracks, holes, or loose sections. Fix any issues before proceeding. Fill cracks and holes with a patching compound. Secure any loose sections with screws or nails. A stable subfloor supports the vinyl flooring and prevents future problems.
Acclimating The Vinyl
Acclimating vinyl ensures smooth installation of vinyl flooring. Let the vinyl adjust to room temperature for better results. This simple step helps prevent future issues.
Before you start installing vinyl flooring, acclimate it to your home. This step ensures your new floor will look great and last longer. Skipping this step can lead to problems like gaps or bubbles.
Why Acclimation Is Important
Vinyl flooring needs time to adjust to your home’s temperature and humidity. This process is called acclimation. It helps the vinyl expand and contract as needed. Without proper acclimation, your floor might not fit well. It can cause edges to curl or seams to open.
How To Acclimate Vinyl
Start by placing the vinyl planks in the room where you will install them. Leave them in their boxes. Let them sit for at least 48 hours. Make sure the room has a stable temperature and humidity. Keep the temperature between 65°F and 85°F. Also, ensure the humidity is between 35% and 65%.
Spread the boxes around the room. This helps the vinyl adjust evenly. Avoid stacking the boxes in one spot. Open the boxes slightly for better air circulation. This will help the vinyl acclimate faster.
By following these steps, Vinyl Flooring Installation the Easy Way will ensure your floor is ready for installation, giving you a smooth, long-lasting result.
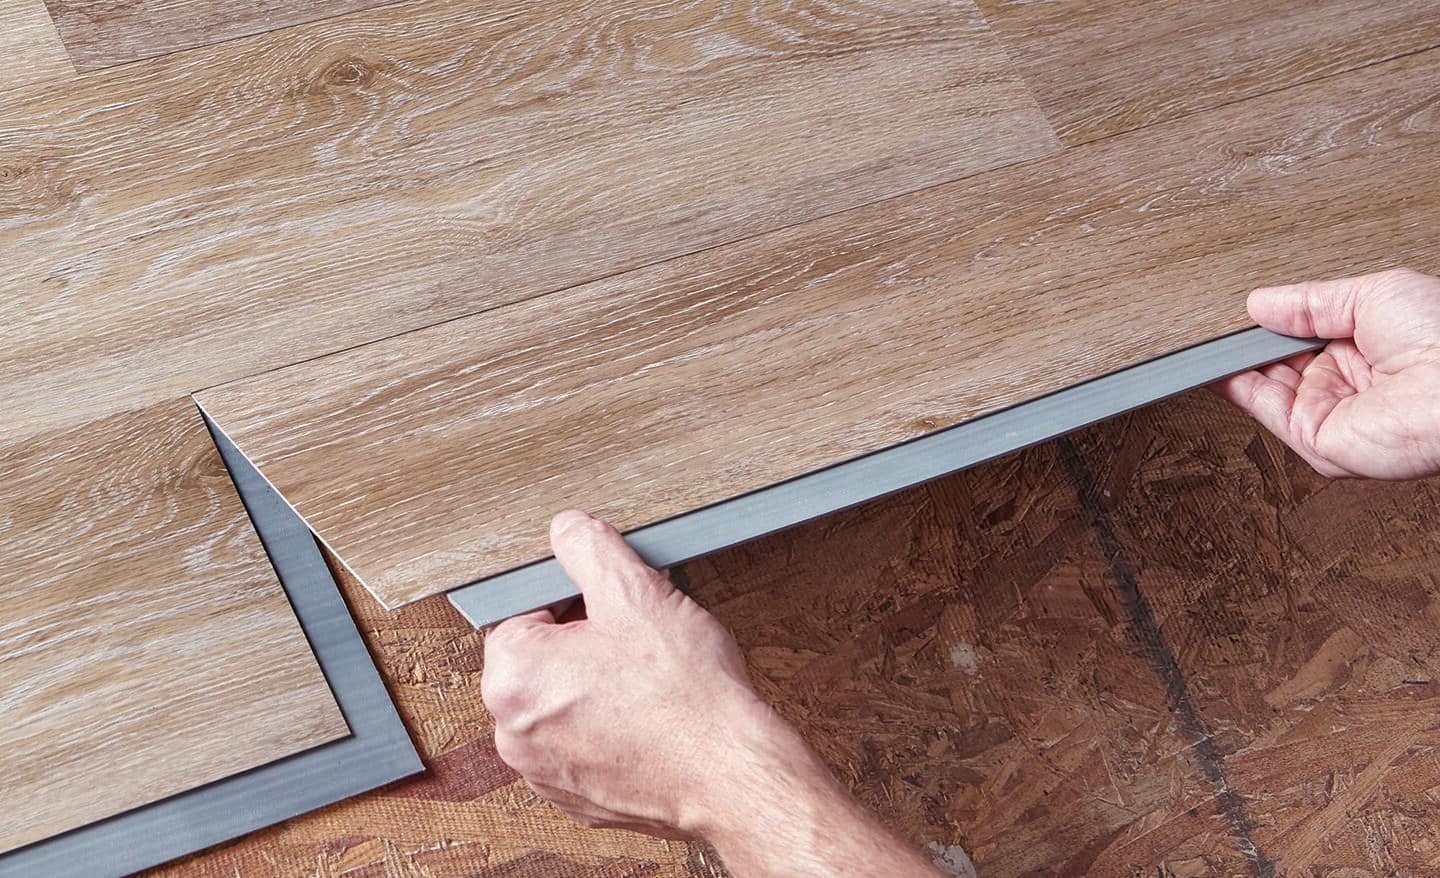
Cutting The Vinyl
Cutting vinyl flooring can seem like a tricky task. But with the right approach, it becomes easy. Getting those precise cuts is key to a smooth installation.
Here are some steps to make the process simple and stress-free.
Measuring And Marking
Start by measuring the area where the vinyl will go. Use a tape measure for accuracy. Write down your measurements. Double-check them to avoid mistakes.
Next, mark the vinyl with a pencil. Use a straightedge or a ruler to draw straight lines. This will guide your cuts.
Using The Right Cutting Tools
Select the right tools for cutting vinyl. A utility knife is a good choice. Make sure the blade is sharp. Dull blades can tear the vinyl.
A pair of heavy-duty scissors can also work. For long, straight cuts, a vinyl cutter might be best. Always cut on a stable surface to avoid slips.
Cutting Around Obstacles
Rooms often have obstacles like vents or pipes. Measure these areas carefully. Mark the vinyl where you need to cut around these objects.
Use a utility knife to make precise cuts. Go slow and steady. For curved cuts, a pair of scissors can help. Take your time to ensure a snug fit around obstacles.
With these tips, cutting vinyl becomes a breeze. Your flooring will look great and fit perfectly.
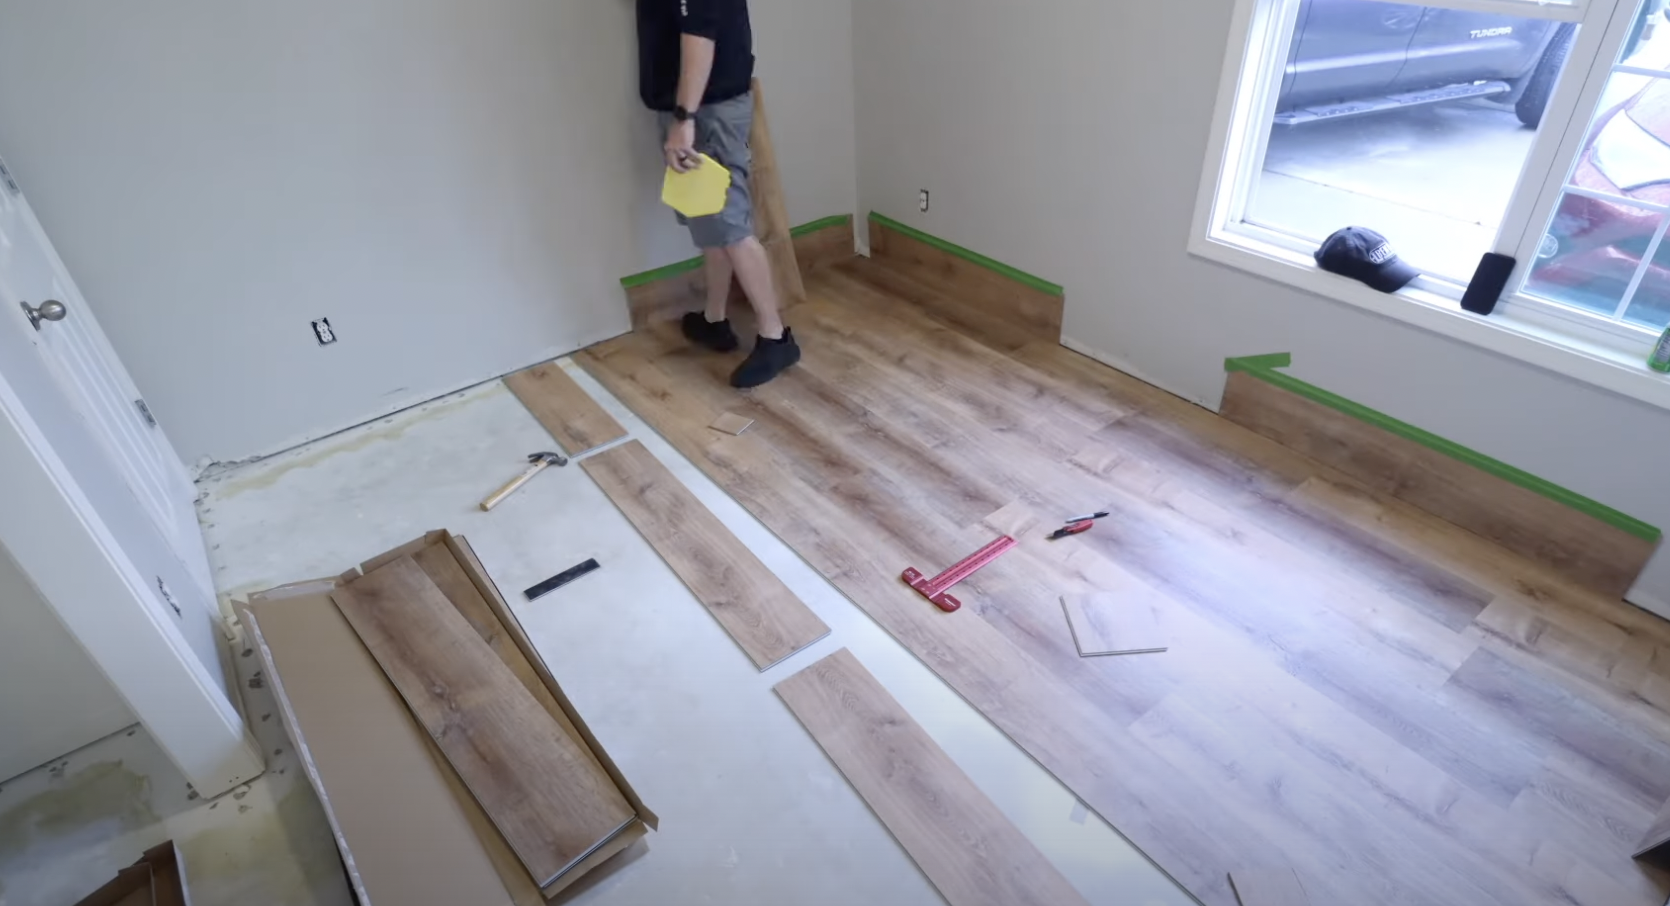
Laying The Vinyl
Laying vinyl flooring can be simple and fun. This guide breaks down the process into easy steps. Let’s dive into how to lay the vinyl and ensure a smooth finish.
Dry Fitting The Pieces
Dry fitting is crucial. It helps you see how the pieces fit. This step prevents mistakes later on.
- First, lay out the vinyl pieces without glue.
- Make sure they fit snugly and cover the whole area.
- Trim pieces as needed to fit around obstacles.
Dry fitting saves time and effort. Adjust the pieces until you are happy with the layout.
Applying Adhesive
Adhesive keeps the vinyl in place. Follow these steps for a secure bond:
- Apply the adhesive evenly using a trowel.
- Work in small sections to prevent it from drying out.
- Press the vinyl into the adhesive firmly.
Ensure you cover the edges well. This prevents peeling later.
Securing The Vinyl
Now, it’s time to secure the vinyl. This step ensures it stays in place and looks great.
- Use a roller to press down the vinyl.
- Start from the center and move towards the edges.
- Pay extra attention to the corners and edges.
A rolling pin works if you don’t have a roller. This step helps remove air bubbles and ensures a smooth finish.
Let the adhesive dry completely. Check the manufacturer’s instructions for drying time.
Once dry, your vinyl floor is ready to use. Enjoy your new floor!
Finishing Touches
Completing your vinyl flooring installation involves several important steps. These finishing touches ensure your floor looks polished and professional. Pay close attention to the details for a seamless finish.
Trimming Excess Vinyl
After laying your vinyl flooring, you might notice some edges that extend beyond the floor space. Use a sharp utility knife to trim the excess vinyl. Be careful and precise to avoid cutting too much.
Keep the blade steady and follow the contour of the wall for a clean edge.
Installing Baseboards
Baseboards cover the gap between the floor and the wall, giving your room a neat appearance. Measure the length of each wall and cut the baseboards to fit. Use a miter saw for angled cuts at the corners.
Attach the baseboards using nails or adhesive, ensuring they sit flush against the wall and floor.
Cleaning Up
Once all the vinyl is trimmed and the baseboards are installed, it’s time to clean up. Sweep the floor to remove any debris or dust. For a thorough clean, use a damp mop with a mild cleaning solution. Make sure the floor is dry to prevent slipping and damage to the vinyl.
By following these steps, your vinyl flooring will look stunning and be ready for years of use.

Credit: www.youtube.com
Maintenance Tips
Vinyl flooring is a popular choice for many homes. It’s durable, stylish, and easy to install. Yet, to keep it looking its best, you need to maintain it properly.
Here are some essential maintenance tips to help you care for your vinyl flooring.
Regular Cleaning
Clean your vinyl floor regularly to avoid dirt buildup. Sweep or vacuum daily to remove dust and debris. Use a damp mop with a mild cleaner weekly. Avoid using harsh chemicals. They can damage the finish and make the floor look dull.
Preventing Damage
Prevent damage by placing mats at all entrances. This reduces dirt and moisture on the floor. Use furniture pads under heavy items. This avoids scratches and dents. Keep pet nails trimmed. Long nails can scratch the floor surface.
Handling Repairs
Even with care, accidents happen. For small scratches, use a vinyl repair kit. These kits are easy to find in hardware stores. For larger damages, replace the affected tiles or planks. Always keep extra pieces from your initial installation. This ensures a perfect match.
Frequently Asked Questions
How To Prepare For Vinyl Flooring Installation?
Ensure the subfloor is clean, dry, and level. Remove any baseboards and trim. Measure the area accurately for the vinyl.
Can I Install Vinyl Flooring Over Existing Floors?
Yes, you can install vinyl over existing floors if they are smooth and in good condition. Ensure no damage or unevenness.
Do I Need Special Tools For Vinyl Flooring?
Basic tools like a utility knife, measuring tape, and a straight edge are needed. A roller ensures proper adhesion.
Is Vinyl Flooring Waterproof?
Yes, vinyl flooring is waterproof, making it suitable for kitchens and bathrooms. It resists spills and moisture effectively.
Conclusion
Vinyl flooring installation can be simple and stress-free. Follow the steps mentioned, and you’ll achieve great results. Remember, preparation is key. Measure your space accurately. Choose quality materials. Take your time with each step. A little patience goes a long way.
Soon, you’ll enjoy a beautiful, durable floor. With these tips, vinyl flooring installation becomes an easy task. Start your project today and see the difference it makes in your home.