How to Cover Popcorn Ceiling With Beadboard: A Step-by-Step Guide

How to cover popcorn ceiling with beadboard is a straightforward process. It offers a clean, modern look without the mess of removing the old ceiling texture.
Popcorn ceilings were popular in the past, but many now seek to update this outdated design. Beadboard presents a charming and practical solution. It adds character and a touch of elegance to any room.
This guide will walk you through each step, making the transformation simple and achievable.
Whether you’re a seasoned DIY enthusiast or a beginner, you can tackle this project with confidence. By the end, your space will have a fresh, stylish ceiling that enhances your home’s overall aesthetic.
Ready to get started? Let’s dive in!
Introduction To Beadboard
Popcorn ceilings can be an eyesore in homes. Updating them with beadboard offers a stylish solution. Beadboard adds charm and elegance to any room. Its classic look can transform outdated ceilings.
Why Choose Beadboard
Beadboard is a versatile material. It suits many design styles. From traditional to modern, beadboard complements different aesthetics. This makes it a popular choice for home renovations.
Additionally, beadboard is easy to install. You don’t need to be a professional. With some basic tools and patience, you can install it yourself.
Benefits Of Beadboard
Choosing beadboard comes with many benefits:
- Cost-Effective: Beadboard is budget-friendly. It offers a high-end look without breaking the bank.
- Easy Maintenance: Beadboard is simple to clean. A quick wipe keeps it looking fresh.
- Durability: Beadboard is sturdy and long-lasting. It withstands daily wear and tear.
- Customizable: Beadboard can be painted any color. This allows you to match your decor easily.
- Conceals Imperfections: Beadboard hides ceiling flaws. It creates a smooth, uniform surface.
Tools And Materials Needed
Before starting the process of covering your popcorn ceiling with beadboard, it’s crucial to gather all the necessary tools and materials. Proper preparation ensures a smooth and efficient project.
Below is a comprehensive guide to the essential tools and required materials you will need.
Essential Tools
- Measuring Tape: Accurate measurements are key to fitting beadboard panels.
- Utility Knife: Useful for cutting and trimming beadboard panels.
- Level: Ensures that your panels are straight and even.
- Power Drill: Needed for securing the beadboard panels to the ceiling.
- Jigsaw: Ideal for cutting around light fixtures and other obstacles.
- Hammer: Used for nailing the beadboard into place.
- Nail Gun: Speeds up the installation process and ensures secure attachment.
- Stud Finder: Helps locate ceiling joists for secure attachment points.
Required Materials
- Beadboard Panels: Choose panels that fit the dimensions of your ceiling.
- Trim and Molding: Adds a finished look and covers edges.
- Adhesive: High-strength adhesive is necessary for attaching beadboard to the ceiling.
- Wood Screws: Provides extra security for holding the beadboard in place.
- Nails: Finishing nails are ideal for securing trim and moldings.
- Caulk: Fills gaps between panels and trim for a seamless finish.
- Paint: Use to match or complement your room’s decor.
- Drop Cloths: Protects your floors and furniture during the installation process.
- Safety Gear: Includes goggles, gloves, and a mask to protect yourself from dust and debris.
Gathering these tools and materials ensures you are well-prepared to cover your popcorn ceiling with beadboard. Proper preparation makes the process smoother and more efficient, leading to a beautiful finished ceiling.
Preparing The Ceiling
Before you start covering your popcorn ceiling with beadboard, you need to prepare the ceiling. Proper preparation ensures that the beadboard adheres well and looks great. This step involves cleaning the popcorn ceiling and removing any obstacles.
Cleaning The Popcorn Ceiling
First, clean the popcorn ceiling. Dust and dirt can interfere with the adhesion of the beadboard. Use a vacuum with a brush attachment to remove loose dust. Be gentle to avoid damaging the texture.
Next, wipe the ceiling with a damp cloth. This removes any remaining dust and grime. Allow the ceiling to dry completely before moving to the next step.
Removing Obstacles
Remove light fixtures, ceiling fans, or vents. This makes it easier to install the beadboard. Turn off the electricity at the breaker box before removing any electrical fixtures.
If any nails or screws are sticking out, remove them. Smooth out any rough spots with sandpaper. Ensure the ceiling is as flat as possible.
Now, your ceiling is ready for the beadboard installation. With a clean and obstacle-free surface, the beadboard will adhere better and look more professional.
Measuring And Cutting Beadboard
Covering a popcorn ceiling with beadboard can enhance your room’s look. To achieve this, you need to measure and cut the beadboard correctly. Accurate measurements and cutting techniques are crucial for a smooth installation.
Taking Accurate Measurements
Start by measuring the dimensions of your ceiling. Use a measuring tape to get the length and width. Write down these measurements on paper. Make sure your tape measure is straight and taut for precise results.
Next, measure the distance between any fixtures like lights or fans. Mark these spots on your beadboard. This helps you avoid cutting errors later. Double-check all measurements before you cut.
Cutting Techniques
Once you have accurate measurements, it’s time to cut the beadboard. Lay the beadboard on a flat surface. Use a pencil to mark your measurements on the board.
Use a circular saw or a jigsaw for cutting. Make sure the blade is sharp. Follow your pencil marks closely. Cut slowly to avoid splintering the wood.
After cutting, sand the edges to remove any roughness. This ensures a clean finish. Now, your beadboard is ready for installation.
Installing Furring Strips
Install furring strips to easily cover popcorn ceiling with beadboard. Secure the strips to the ceiling joists first. Then, attach the beadboard panels to the strips.
Installing furring strips is an essential step in covering a popcorn ceiling with beadboard. These strips provide a solid and even surface for attaching the beadboard panels.
This process is straightforward and can be done with basic tools. Below, we detail the purpose of furring strips and how to attach them.
Purpose Of Furring Strips
Furring strips create a level surface for your beadboard. Popcorn ceilings are often uneven. Furring strips help to even out these imperfections. They also provide a secure base to attach the beadboard. This ensures the beadboard stays in place over time.
Attaching Furring Strips
Start by measuring the ceiling. Cut the furring strips to fit the length of the room. Use a stud finder to locate ceiling joists. Mark these spots on the ceiling.
Next, attach the furring strips perpendicular to the joists. Use screws to secure them into the joists. Space the strips about 16 inches apart. This provides enough support for the beadboard.
Ensure each strip is level. Use a level tool for accuracy. Adjust as needed before securing each strip. Once all strips are in place, you are ready for the beadboard. This strong foundation will hold the beadboard securely.
Following these steps ensures a smooth and sturdy installation. This makes your beadboard ceiling look professional.

Credit: designingvibes.com
Securing Beadboard Panels
Securing beadboard panels is an essential step in covering your popcorn ceiling. This process ensures that the panels stay in place and look great for years. It involves positioning the panels correctly and then nailing and gluing them for a secure fit.
Positioning Panels
Start by measuring your ceiling. Cut the beadboard panels to fit the measurements. Place the first panel in the corner of the room. Align it with the wall and ceiling edges. Use a level to ensure the panel is straight. This step is crucial for a smooth, professional look.
Continue placing the panels side by side. Make sure the grooves fit snugly together. This will hide the seams and create a uniform appearance. Trim the panels as needed to fit around light fixtures and vents. Keep checking that each panel is level and aligned.
Nailing And Gluing Panels
After positioning the panels, it’s time to secure them. Use construction adhesive on the back of each panel. Apply the adhesive in a zigzag pattern. Press the panel firmly against the ceiling. Hold it in place for a few minutes to allow the glue to set.
Next, use a nail gun to further secure the panels. Place nails along the edges and through the grooves. This will keep the panels from shifting. For a seamless look, sink the nails below the surface. Fill the nail holes with wood filler and sand them smooth.
Repeat these steps for each panel. Ensure each one is glued and nailed securely. This double method of nailing and gluing provides extra strength. Your beadboard ceiling will stay in place and look fantastic for years.
Finishing Touches
After successfully installing beadboard over your popcorn ceiling, it’s time for the finishing touches. This final step will ensure a seamless and polished look to your ceiling.
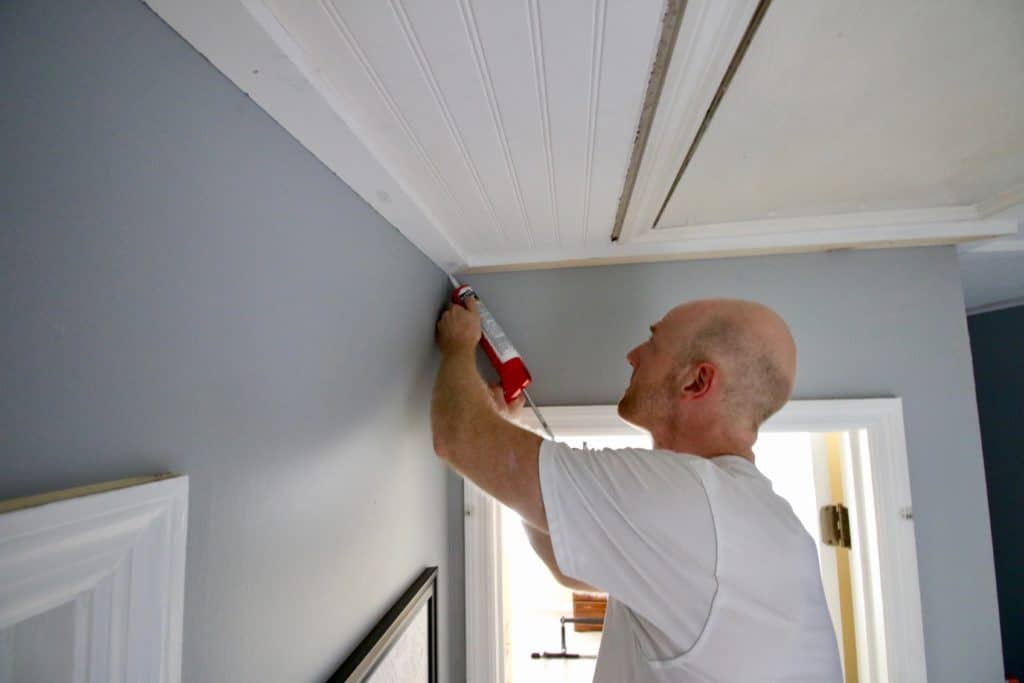
Filling Gaps And Seams
First, inspect the ceiling for any gaps or seams between the beadboard panels. Use a high-quality wood filler to fill these gaps. Apply the filler with a putty knife and smooth it out evenly.
Let the filler dry completely. Once dry, sand the filled areas with fine-grit sandpaper until smooth. This will help create a uniform surface for painting.
Painting And Sealing
Before painting, clean the beadboard with a damp cloth to remove any dust. Choose a high-quality primer and apply a coat to the beadboard. This helps the paint adhere better and provides a smooth finish.
Once the primer is dry, it’s time to paint. Use a paint roller for larger areas and a brush for edges and corners. Apply at least two coats of paint for an even finish.
Finally, seal the beadboard with a clear sealant. This step protects the paint and adds durability. Allow the sealant to dry completely before moving furniture back into the room.
Credit: www.charlestoncrafted.com
Maintenance Tips
Maintaining your beadboard ceiling is essential for its longevity and appearance. Regular care ensures it remains clean and damage-free. Here are some maintenance tips to help you keep your beadboard ceiling in top condition.
Routine Cleaning
Dust and dirt can accumulate on your beadboard ceiling. Routine cleaning helps maintain its look.
- Use a soft-bristle broom to remove dust.
- Wipe with a damp cloth for stubborn dirt.
- Avoid harsh chemicals; they can damage the surface.
For deeper cleaning, mix water with mild detergent. Apply gently with a sponge. Dry with a clean cloth to prevent water spots.
Handling Repairs
Minor damages can occur over time. Knowing how to handle repairs helps maintain the ceiling’s integrity.
- Identify the Damage: Look for cracks, holes, or loose panels.
- Fill Cracks and Holes: Use wood filler for small cracks. Allow it to dry, then sand smooth.
- Reattach Loose Panels: Secure loose panels with finishing nails. Ensure they are flush with the surface.
- Touch Up Paint: Match the paint color. Apply it to repaired areas for a seamless finish.
Regular inspections can prevent small issues from becoming major problems. Addressing repairs quickly ensures your beadboard ceiling stays beautiful and functional.
Frequently Asked Questions
How Do I Prepare A Popcorn Ceiling For Beadboard?
To prepare a popcorn ceiling for beadboard, first, clean the surface. Then, scrape off any loose texture. Ensure the ceiling is dry and smooth before installation.
Can I Install Beadboard Over A Popcorn Ceiling?
Yes, you can install beadboard over a popcorn ceiling. Ensure the ceiling is clean and level. Securely attach the beadboard panels using nails or adhesive.
What Tools Are Needed To Cover A Popcorn Ceiling?
You will need a tape measure, level, saw, nails, adhesive, and a hammer. Safety gear like goggles and a mask is also recommended.
Does Beadboard Need To Be Painted Before Installation?
It’s best to paint beadboard before installation. This ensures an even coat and saves time. Touch up any areas after installation if necessary.
Conclusion
Covering a popcorn ceiling with beadboard adds elegance to any room. It hides imperfections and enhances the ceiling’s appearance. The process is simple and affordable. Your room will look more modern and cleaner. Beadboard is also durable and easy to maintain.
Follow the steps outlined in this guide for best results. Enjoy the new look of your space!