Painting Fiberglass Showers: A Step-by-Step DIY Guide
Painting fiberglass showers can breathe new life into your bathroom. It’s a cost-effective way to update without a full remodel. Fiberglass showers are popular for their durability and sleek look. Over time, though, they can become dull or stained. Instead of replacing the whole unit, painting offers a budget-friendly alternative. With the right materials and techniques, you can achieve a smooth, lasting finish.
This guide will walk you through the steps to transform your shower. You’ll learn how to prepare the surface, choose the right paint, and apply it for the best results. Whether you’re a DIY enthusiast or a first-timer, painting your fiberglass shower can be a rewarding project. Let’s dive into the details and get your shower looking brand new.
Preparation
Preparation is the key to a successful Painting fiberglass showers. Proper preparation ensures the paint adheres well and lasts longer. It involves several important steps that you must follow carefully. Let’s dive into the essential steps for preparing your fiberglass shower for painting.
Cleaning The Surface
The first step in preparation is cleaning the surface. Dirt and grime can prevent the paint from sticking. Use a mild cleaner and a sponge to scrub the entire shower. Pay special attention to corners and crevices where dirt tends to accumulate. Rinse thoroughly with water and let it dry completely.
Repairing Cracks And Chips
Inspect the fiberglass shower for any cracks or chips. These imperfections can ruin the final look of your paint job. Use a fiberglass repair kit to fix any damage. Follow the instructions on the kit for best results. Sand the repaired areas to ensure they are smooth and level with the rest of the surface.
Choosing The Right Paint
Choosing the right paint is crucial for painting fiberglass showers. The paint must adhere well to the fiberglass surface. It should also withstand the damp, humid environment of a shower. This ensures a long-lasting, beautiful finish.
Types Of Paints
There are several types of paints suitable for fiberglass showers. Epoxy paint is a popular choice. It offers excellent adhesion and durability. Acrylic paint is another option. It is easy to apply and dries quickly. Urethane paint is also effective. It provides a hard, glossy finish. Each type has its own advantages. Choose one based on your specific needs.
Selecting The Color
Color selection is an important step in painting fiberglass showers. Light colors make the space feel larger and brighter. Dark colors add a touch of elegance. Neutral colors offer versatility. They match well with various decor styles. Consider the overall look of your bathroom. Choose a color that complements existing elements. This creates a cohesive and pleasing appearance.
Priming The Surface
Priming the surface of your fiberglass shower is a crucial step. It ensures the paint adheres properly and lasts longer. Skipping this step can lead to peeling and uneven paint. So, let’s dive into the importance and application of primer.
Importance Of Primer
Primer acts as a bonding agent. It helps the paint stick to the fiberglass. This creates a smooth, durable finish. Without primer, the paint can chip and flake off. Primer also blocks stains and imperfections. This ensures a clean, uniform look.
Applying Primer
First, clean the surface thoroughly. Remove any soap scum and grime. Use a mild detergent and water. Rinse well and let it dry completely. Next, sand the surface lightly. This helps the primer adhere better. Use fine-grit sandpaper for this step.
Now, apply the primer. Use a high-quality, bonding primer. Apply it with a brush or roller. Make sure to cover all areas evenly. Let the primer dry according to the instructions. This usually takes a few hours. Once dry, inspect the surface. Ensure it’s smooth and even before painting.
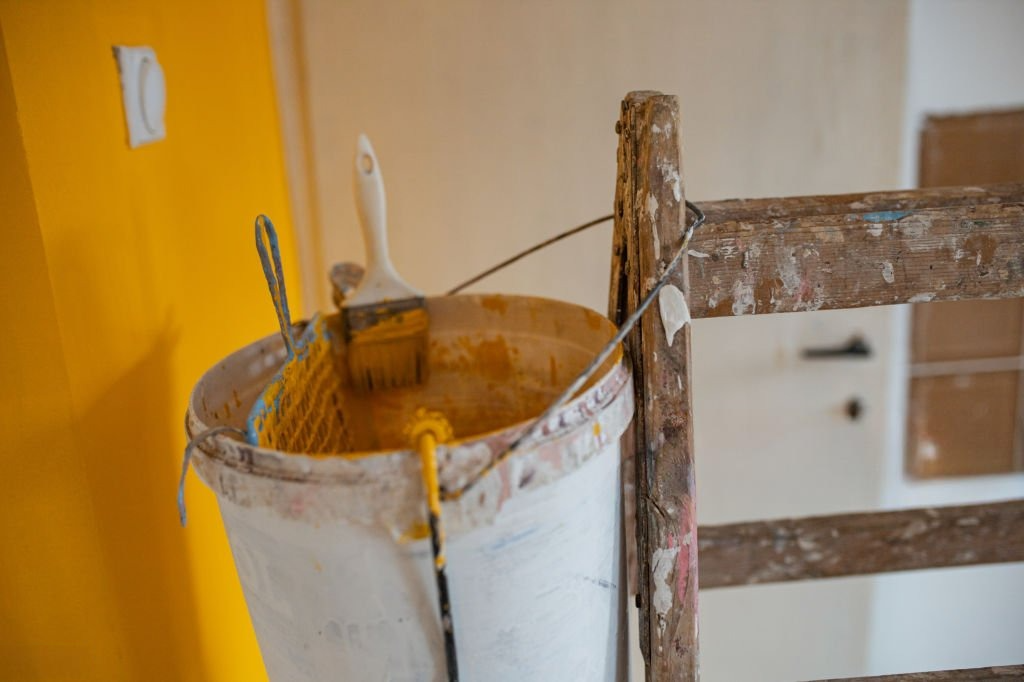
Painting The Shower
Painting a fiberglass shower can refresh your bathroom. It brings a new look without the high cost. Proper preparation and technique are key. This guide will help you achieve a smooth, even finish. Let’s explore the steps for painting your shower.
Techniques For Even Coating
Start by cleaning the shower. Use a mild detergent to remove soap scum. Rinse thoroughly and let it dry. Sand the surface with 220-grit sandpaper. This helps the paint adhere better. Wipe away dust with a damp cloth.
Apply a primer designed for fiberglass. Use a spray gun for the best results. Keep the spray gun about 8-12 inches from the surface. Move your hand in a steady, sweeping motion. Overlap each pass slightly to avoid streaks.
Once the primer is dry, it’s time to paint. Choose a paint that is suitable for fiberglass. Apply the paint in thin, even coats. Use the same technique as with the primer. Multiple thin coats are better than one thick coat.
Drying Time Between Coats
Allow each coat to dry completely. This prevents the paint from peeling. Check the paint can for recommended drying times. Generally, wait at least 24 hours between coats. The humidity and temperature can affect drying time. Make sure the area is well-ventilated.
After the final coat, let the paint cure. This can take up to 72 hours. Avoid using the shower during this time. The longer you wait, the better the finish will be. Patience is key to a durable, beautiful shower.
Finishing Touches
Adding the final touches to painting fiberglass showers ensures a smooth, polished look. Proper technique and patience result in a professional finish.
Completing the painting of your fiberglass shower can feel rewarding. The final steps ensure durability and a polished look. These finishing touches provide a professional appearance that lasts.
Applying A Sealant
Applying a sealant protects your painted shower. It adds an extra layer of defense against moisture. Choose a sealant made for fiberglass surfaces. Follow the instructions on the product for best results. Use a clean, soft brush or roller to apply the sealant evenly. Make sure to cover all areas. Allow the sealant to dry completely before using the shower again.
Inspecting For Touch-ups
Inspect your work carefully after the sealant dries. Look for any missed spots or uneven areas. Use a small brush to touch up these areas. Ensure the paint blends well with the surrounding surface. Check the edges and corners closely. These spots often need extra attention. A thorough inspection ensures a flawless finish.
Curing And Maintenance
Painting fiberglass showers can give a fresh look to your bathroom. After painting, curing and maintenance are vital steps to ensure longevity. Proper curing ensures the paint adheres well. Regular maintenance keeps the surface looking new.
Curing Time
The curing time for painted fiberglass showers is crucial. Allow the paint to dry thoroughly. Typically, curing takes about 24 to 48 hours. During this period, avoid using the shower. This prevents water damage to the fresh paint. Ensure the bathroom is well-ventilated. This speeds up the drying process.
Maintaining The Painted Surface
Maintaining a painted fiberglass shower is simple. Use gentle, non-abrasive cleaners. Avoid harsh chemicals that can damage the paint. Clean the shower regularly to prevent soap scum build-up. Use a soft cloth or sponge for cleaning. This keeps the surface smooth and shiny.
Inspect the painted surface periodically. Look for any chips or peeling. Touch up any damaged areas promptly. This prevents further damage. A well-maintained shower looks new for a long time. Proper care ensures the longevity of the paint job.
Troubleshooting
Painting fiberglass showers can be challenging. During the process, you might face some issues. This troubleshooting section will help you handle common problems and fix mistakes.
Common Issues
Even with careful preparation, problems can occur. Here are some common issues:
- Peeling paint: Often due to poor surface preparation.
- Uneven coverage: This happens when the paint is not applied evenly.
- Streaks or brush marks: Using the wrong brush can cause this.
- Bubbles: Air trapped under the paint can create bubbles.
- Poor adhesion: This may occur if the surface is not properly primed.
Tips For Fixing Mistakes
Mistakes can happen. Here are some tips to fix them:
- For peeling paint: Sand the area and reapply primer. Then, repaint.
- For uneven coverage: Apply a second coat of paint. Ensure even strokes.
- For streaks or brush marks: Use a high-quality roller or brush. Apply light, even pressure.
- For bubbles: Pop the bubbles with a pin. Sand the area and repaint.
- For poor adhesion: Clean the surface thoroughly. Use a bonding primer.
Using these tips, you can solve most painting issues. Always take your time and follow the steps carefully.
Frequently Asked Questions
How Do You Paint A Fiberglass Shower?
First, clean and sand the surface. Apply a primer designed for fiberglass. Finally, use a high-quality epoxy paint.
What Type Of Paint For Fiberglass Showers?
Use an epoxy-based paint. It’s durable and adheres well to fiberglass surfaces, ensuring a long-lasting finish.
Can You Paint Over Fiberglass Without Sanding?
No, sanding is necessary. It helps the primer and paint adhere better, ensuring a smooth, durable finish.
How Long Does Fiberglass Paint Last?
With proper preparation and application, fiberglass paint can last up to 10 years. Regular maintenance helps extend its life.
Conclusion
Painting fiberglass showers can transform your bathroom’s look easily. With the right tools and preparation, the process is straightforward. Make sure to follow each step carefully to ensure a smooth, lasting finish. This DIY project saves money and gives a fresh, new appearance to your shower.
Enjoy your newly painted fiberglass shower and the satisfaction of a job well done. Happy painting!