Painting Over Gel-Stained Cabinets: Transform Your Kitchen Easily
Thinking about giving your cabinets a fresh look? Painting over gel-stained cabinets is a great option. This simple change can transform your kitchen or bathroom. Gel-stained cabinets have a rich, glossy finish. But, over time, they can look outdated. Painting them offers a cost-effective way to refresh your space. It’s a project that you can tackle over a weekend.
Plus, the result can be stunning. Whether you’re aiming for a modern, sleek look or a cozy, farmhouse vibe, paint can do wonders. In this blog post, we’ll guide you through the process. You’ll learn how to prepare the cabinets, choose the right paint, and apply it like a pro. Let’s get started on this DIY adventure!
Introduction To Gel-stained Cabinets
Gel-stained painting over gel-stained cabinets are a popular choice for many homeowners. They bring a rich, deep color to wood surfaces. This type of staining can transform old cabinets into beautiful, updated pieces. Painting over gel-stained cabinets can be an easy way to refresh your kitchen or bathroom.
What Are Gel Stains?
Gel stains are thick, pigmented wood stains. They sit on top of the wood rather than soaking in. This makes them different from traditional stains. Gel stains work well on cabinets and furniture. They provide a uniform color and can hide imperfections.
Gel stains are easy to apply. They do not drip or run, making them user-friendly. They are ideal for vertical surfaces like cabinet doors. You can achieve a professional-looking finish with minimal effort.
Benefits Of Gel-stained Cabinets
Gel-stained cabinets offer several benefits. Here are some reasons why homeowners love them:
- Rich color: Gel stains give wood a deep, vibrant hue.
- Hide imperfections: They cover scratches and blemishes.
- Easy application: No dripping or running makes staining simple.
- Durability: Gel-stained surfaces resist wear and tear.
- Versatility: Suitable for cabinets, furniture, and more.
painting over gel-stained cabinets can give your space a fresh look. The rich color base can add depth to your new paint job. It’s an excellent way to update your home without replacing cabinets.
Preparing Your Cabinets
Painting over gel-stained cabinets requires proper preparation. This ensures a smooth and durable finish. Follow these steps to get your cabinets ready.
Cleaning And Degreasing
Start by cleaning your cabinets. Remove dust, dirt, and grime. Use a mild soap and water solution. Wipe down all surfaces with a damp cloth. Rinse and dry thoroughly.
Next, degrease the cabinets. Use a degreasing agent or a mixture of vinegar and water. Apply the solution with a clean cloth. Pay attention to areas near the stove and handles. These spots often have more grease. Rinse and let the cabinets dry completely.
Sanding The Surface
Sanding is crucial. It helps the paint adhere better. Start with a medium-grit sandpaper, around 120-grit. Sand the entire surface lightly. Focus on removing the glossy finish. Do not sand too hard. You don’t want to damage the wood.
After sanding with medium-grit, switch to a fine-grit sandpaper, around 220-grit. This will smooth the surface. Wipe away dust with a tack cloth or a damp rag. Ensure all surfaces are dust-free before moving on. Now, your cabinets are ready for the next steps. Proper preparation leads to a beautiful, long-lasting finish.
Choosing The Right Paint
Deciding on the right paint can make a big difference. It ensures a beautiful and long-lasting finish for your gel-stained cabinets. Selecting the right type and color of paint is crucial. It affects the overall look and durability of your cabinets.
Types Of Paint
There are several types of paint to consider. Each has its pros and cons. Here are the most common options:
- Latex Paint: Dries quickly and is easy to clean. It is also low in odor.
- Oil-Based Paint: Provides a smooth finish and is very durable. However, it has a strong odor.
- Acrylic Paint: Offers a durable finish and is water-resistant. It is also easy to clean up with water.
Choose based on your needs and preferences. Consider the ease of application and the finish you desire.
Color Selection Tips
Choosing the right color is just as important. Here are some tips to help you decide:
- Consider Your Kitchen Style: Match the color with your kitchen’s overall theme. For a modern look, go with neutral colors like white or gray.
- Test Samples: Try paint samples on a small area first. See how they look in different lighting.
- Think About Size: Light colors can make a small kitchen look bigger. Dark colors can add a cozy feel to a large kitchen.
Remember, your cabinet color can change the whole feel of your kitchen. Choose wisely and enjoy the process.
Gathering Supplies
Painting over gel-stained cabinets can be a rewarding DIY project. Gathering the right supplies is crucial for a smooth process. This section will guide you through the necessary tools and protective gear you need.
Essential Tools
Start with basic tools. You will need sandpaper, a paintbrush, and a paint roller. Sandpaper helps create a rough surface for better paint adhesion. Choose a paintbrush for corners and edges. Use a paint roller for flat surfaces. Don’t forget painter’s tape. It helps keep lines clean and prevents paint from spreading to unwanted areas. A paint tray is also necessary for holding your paint. Choose a high-quality primer and paint for the best results.
Protective Gear
Safety is important during any painting project. Wear gloves to protect your hands from chemicals. A mask will help you avoid inhaling fumes. Safety goggles protect your eyes from splashes. Use old clothes or coveralls to protect your clothing. Lay down drop cloths to protect your floors and surrounding areas from paint spills. Good ventilation is also crucial. Open windows or use fans to circulate air.
Priming The Cabinets
Priming the cabinets ensures better painting over gel-stained cabinets surfaces. It creates a smooth base for a flawless finish.
Priming the cabinets is a crucial step in painting over gel-stained surfaces. This process prepares the cabinets for the new paint, ensuring a smooth and long-lasting finish.
Why Primer Is Necessary
Primer creates a stable base for the paint. Gel stains often have a glossy finish. This can prevent paint from adhering properly. Primer solves this issue. It helps the paint stick better and last longer. It also blocks stains and tannins from bleeding through the paint.
Application Techniques
Start by cleaning the cabinets thoroughly. Use a degreaser to remove any oil and dirt. Once clean, let them dry completely. Sand the gel-stained surface lightly. This helps the primer adhere better. Use a fine-grit sandpaper for this task.
Apply the primer with a high-quality brush or roller. Cover all surfaces evenly. Make sure to reach corners and edges. Apply in thin, even coats. Let the first coat dry completely. Check the primer’s instructions for drying times. Apply a second coat if necessary.
After the primer dries, inspect the surface. Look for any missed spots or uneven areas. Sand lightly again if needed. This ensures a smooth base for the paint. With the cabinets primed, they are ready for painting. Proper priming ensures a professional-looking finish.

Credit: letspaintfurniture.com
Painting The Cabinets
Painting over gel-stained cabinets can refresh your kitchen. It can give it a new, bright look. The process is simple but needs attention to detail. This section will guide you through painting your cabinets. Follow these steps to ensure a smooth and durable finish.
First Coat Application
Start by gathering your supplies. You will need a good quality paint, brushes, and rollers. Clean your cabinets with a degreaser. This removes any residue that may affect the paint. Sand the surface lightly to help the paint adhere better.
Apply a primer designed for glossy surfaces. This step is crucial for a smooth finish. Let the primer dry completely before moving on. Next, stir your paint well to ensure an even color. Use a brush for edges and corners. A roller works best for flat surfaces.
Apply the first coat of paint in thin, even strokes. Avoid drips and runs by not overloading your brush or roller. Let the first coat dry thoroughly. This may take several hours. Patience is key for a professional look.
Second Coat Tips
Inspect the first coat for any imperfections. Lightly sand any rough spots. Clean off the dust before applying the second coat. Stir the paint again to maintain consistency. Apply the second coat just like the first. Thin, even strokes work best. Pay attention to corners and edges. Make sure they are fully covered. Let the paint dry completely. This ensures a durable finish.
Once dry, check for any missed spots. Touch them up as needed. Your cabinets should now look fresh and new. Enjoy your beautifully painted cabinets!
Finishing Touches
Finishing touches are crucial for a professional look when painting over gel-stained cabinets. These final steps ensure durability and a polished appearance. They also help to protect your hard work and make your cabinets stand out.
Sealing For Durability
Sealing your cabinets is essential. It helps protect the paint from chipping and wear. Choose a high-quality sealer compatible with your paint type. Apply the sealer using a clean brush or roller. Make sure to cover all surfaces evenly. Allow the sealer to dry completely before handling the cabinets. This step ensures long-lasting results and keeps your cabinets looking fresh.
Hardware Reinstallation
Reinstalling hardware is the final step. It gives your cabinets a finished look. Clean the hardware before reattaching it. Use a screwdriver to secure each piece firmly. Check that all handles and knobs are aligned correctly. This attention to detail makes a big difference. Your cabinets will look new and well-maintained.
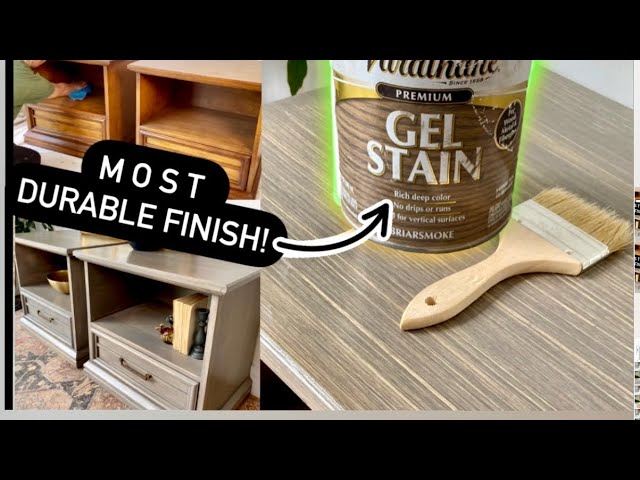
Credit: www.youtube.com
Maintaining Your Painted Cabinets
Maintaining your painted cabinets is essential for preserving their fresh look. Proper care ensures your hard work lasts longer. Below are some tips to keep them looking new and bright.
Cleaning Tips
Regular cleaning is crucial. Use a soft cloth and mild soap. Avoid harsh chemicals as they can damage the paint. Wipe spills immediately to prevent stains. Dust weekly to keep surfaces clean. For tough spots, use a gentle scrubbing pad.
Touch-up Advice
Minor chips are inevitable. Keep some matching paint handy. Use a small brush for touch-ups. Lightly sand the chipped area first. Apply paint in thin layers. Allow each layer to dry before adding more. This ensures a smooth finish.
Frequently Asked Questions
Can You Paint Over Gel-stained Cabinets?
Yes, you can paint over gel-stained cabinets. First, clean and sand the surface. Then, apply a primer before painting.
What Primer Should I Use?
Use a high-quality bonding primer. It ensures the paint adheres well to the gel-stained surface.
Do I Need To Sand Before Painting?
Yes, sanding is necessary. It helps the primer and paint stick better to the gel-stained cabinets.
How Many Coats Of Paint Are Needed?
Typically, two coats of paint are sufficient. Ensure each coat dries completely before applying the next.
Conclusion
Painting over gel-stained cabinets can refresh your kitchen. The process is simple. Clean the cabinets well. Sand them lightly. Apply a good primer. Paint with your chosen color. Enjoy the new look. This project is budget-friendly and boosts home appeal.
With patience, you’ll achieve great results. Your kitchen will feel new and vibrant. Try it out and see the difference. Happy painting!